Our current order processing time is: 1 business day
We sell B2B only. In most states, a signed sales tax exemption form is required to purchase. Our minimum order is $125.
Note: As of Wednesday 5/13/26 we are experiencing a checkout issue with American Express cards. We are attempting to fix this issue, but in the meantime, please use a different kind of credit card, or call our office to place your order. 440-234-5400.
Inspiration & Education
DESIGN GALLERY
If a picture is worth a 1000 words, then this is the most valuable section of our site! Get inspired by beautiful designs!
DESIGN VIDEOS
View our design videos for the latest tips and tricks for the industry.
BLOG
Check out our blog for the latest articles on tips and tricks for the industry.
From Coat Rack to Floral Basket Arch: How to Design a Floral Arch
With summer fast approaching, it is time for florists and event designers to switch focus from winter greenery to colorful flowers and bushes! What better way to kick off your busy season than with stunning floral arches? Read more about this trend here.
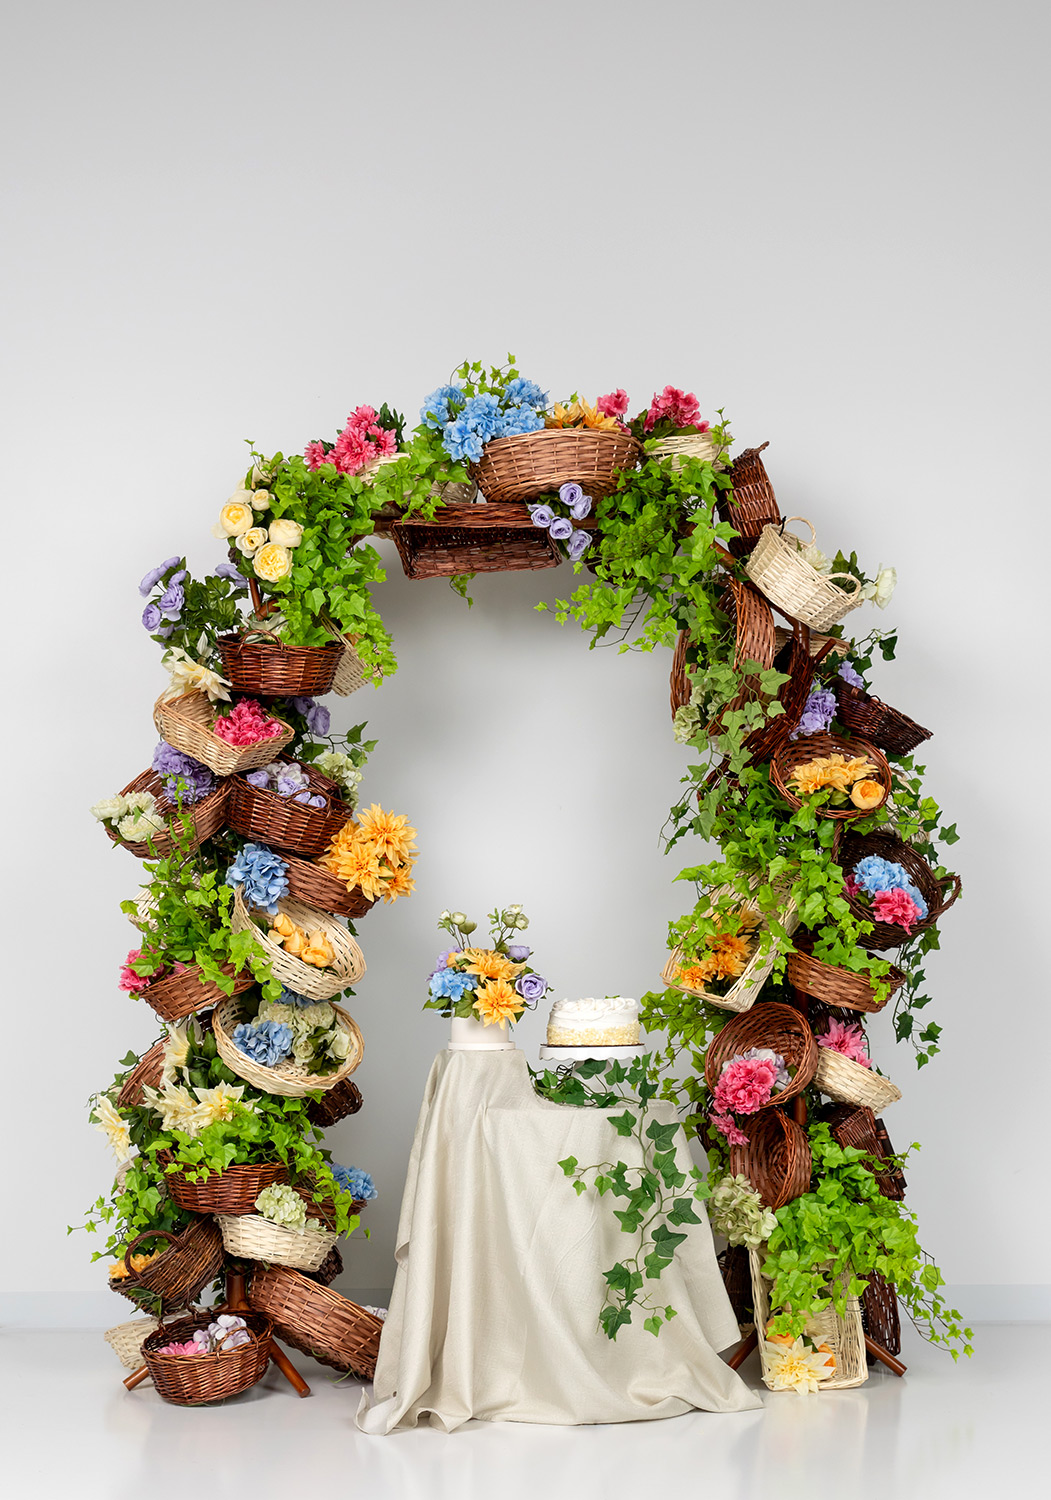
Tom Bowling—certified by the American Institute of Floral Designers (AIFD) and a member of the Professional Floral Communicators International (PFCI)—helped Pioneer Imports & Wholesale design this gorgeous floral basket arch. It features coat racks and PVC socket elbows for the arch structure, decorated with a plethora of willow baskets, wholesale silk flowers and bushes, and greenery garlands.
Read on for the complete list of materials you will need and instructions to follow to create this floral basket arch for your clients. Watch our video tutorial for a step-by-step demonstration of how it is done!
Materials You Need for This Floral Basket Arch
To create this floral basket arch, we used four coat racks and four 45-degree PVC socket elbows. You will also need a variety of willow baskets, greenery garlands, silk flower stems or bushes, plenty of floral wire, zip ties, a pair of scissors, and a drill to secure the top of the arch into place.
Below is a list of the specific materials that we used to design our floral basket arch:
4 coat racks (more details on this in step one, below)
4, 45-degree PVC socket elbows
Floral wire
Zip ties/twine
Scissors
Electric drill
Regular and “Dinner Plate” Dahlia bushes
How to Make a Floral Arch With Coat Racks & Baskets
Step 1: Assemble the coat racks.
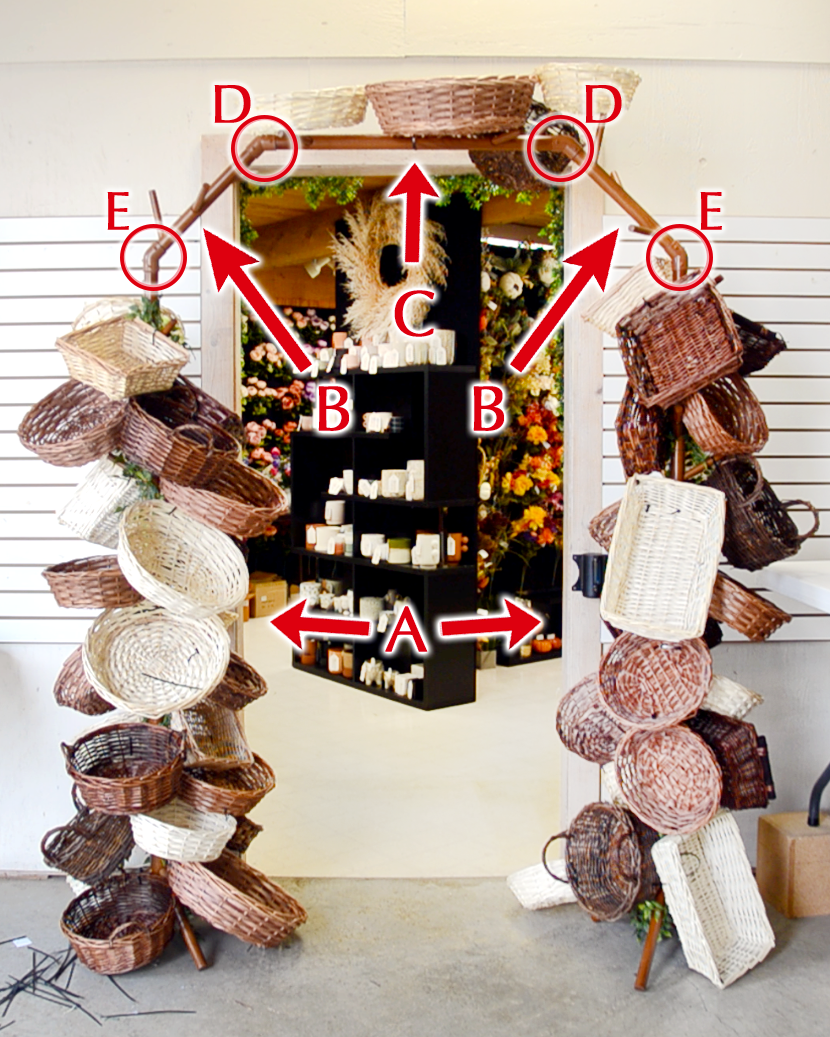
First, you’ll need to assemble two of the coat racks, standing them upright to create the sides of the arch (A).
Remove and discard the bases of the third and fourth coat racks and cut or disassemble/reassemble the remaining sections into three pieces. You’ll need two pieces that are the same length (B) and one, longer piece (C) that will make the top of the arch, as shown in the photo below.
PRO TIP: To avoid the need to make cuts, use coat racks that come in multiple pieces. We found adjustable-height coat racks on Amazon that come in four pieces each, so we could easily separate and re-work the sections without any cutting! This provides some flexibility when it comes to the size of your floral arch, too.
Step 2: Connect the PVC socket elbows to the coat racks.
Connect the three pieces (B, C, B) to each other with two 45-degree PVC socket elbows (D). Attach the other two socket elbows to the tops of the standing racks (E).
However, set aside the top arch piece for now—we’ll attach it to the sides later.
Step 3: Wrap & secure the garland greenery.
Then, wrap your greenery garlands around the racks and secure them into place with floral wire at the top and bottom of the arch.
Step 4: Attach the first basket to the base of the coat rack.
Next, choose your first basket to add to the coat rack.
PRO TIP: We recommend starting at the base and working up.
Attach the basket to the coat rack by inserting a zip tie through the weaves at the top of the basket. Add a second zip tie to secure the bottom.
Step 5: Attach baskets to both sides of the arch.
Attach more baskets around the base, then start working upward.
PRO TIP: You may want to use a zip-tie to secure one basket directly to another.
Anchor each basket in at least one spot to the frame of the coat rack for stability, if possible.
Once you reach the top of one of the coat racks, repeat the process on the other side.
Step 6: Attach the remaining baskets to the top of the arch.
Then, in the same way, attach baskets to the top portion of the arch. It’s easier to do so on a table to prevent your arms from getting tired.
PRO TIP: Leave room at both ends so that you can easily attach the top of the arch to the structure.
Step 7: Attach the top of the arch to the coat racks.
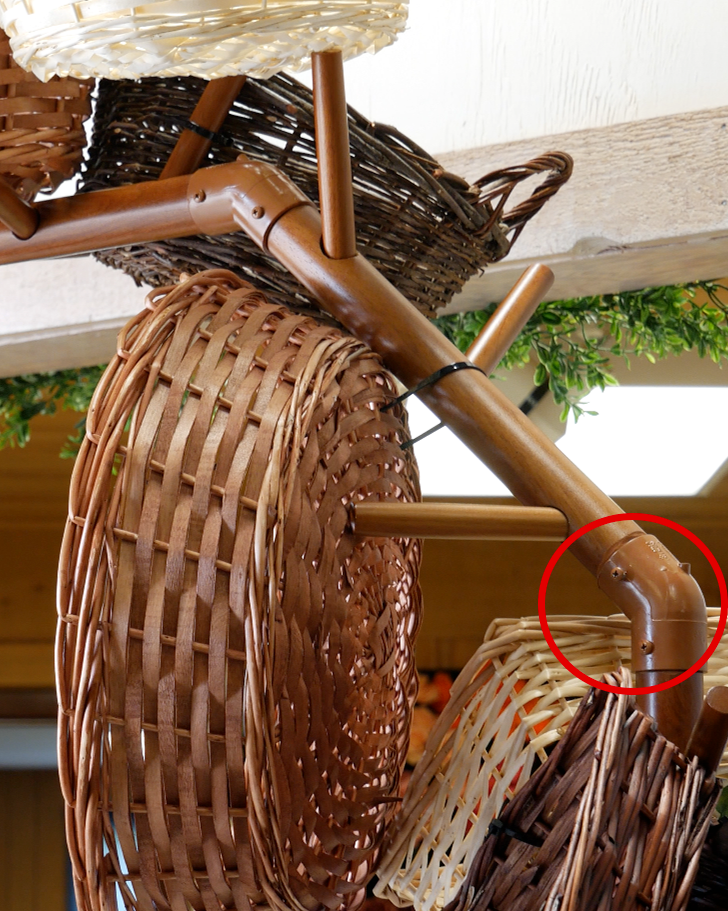
Once you’ve added most of the baskets, attach the top of the structure to the standing coat racks using the PVC socket elbows you added in step two (shown in the photo below.)
Then, add more baskets to fill in any empty spots.
Step 8: Add & secure additional garlands.
Next, string additional greenery garlands around and through the baskets. Be sure to use floral wire to secure the greenery in place. Step back every few minutes or so to make sure your floral arch looks balanced on both sides.
PRO TIP: This time, you may choose to leave some of the ends trailing in or out of the baskets to add the illusion of movement and imitate the look of natural growth.
Step 9: Arrange & secure your silk flowers to the arch.
Finally, start adding your silk flowers. You can insert and twist the stems through the weaves in the willow baskets to secure them in place. Use floral wire or zip ties for extra security, especially at the top of the arch.
PRO TIP: Vary the placement of different flowers for a more natural, whimsical feel, or experiment with patterns of colors bunched together. Be sure to check out our social media for quick, expert tips on color placement and floral arrangements.
How to Deconstruct & Transport Your Floral Basket Arch
If you want to easily deconstruct and transport your floral arch, you’ll have to secure the greenery and baskets more carefully, paying close attention to the removable top of the arch.
For example, avoid securing one basket with zip ties to both the top of the arch and the side of the arch. Instead, secure it in two places to either the top piece or the side so you can separate the arched frame without ruining the basket.
Enhance Your Clients’ Events With Floral Arch Decor
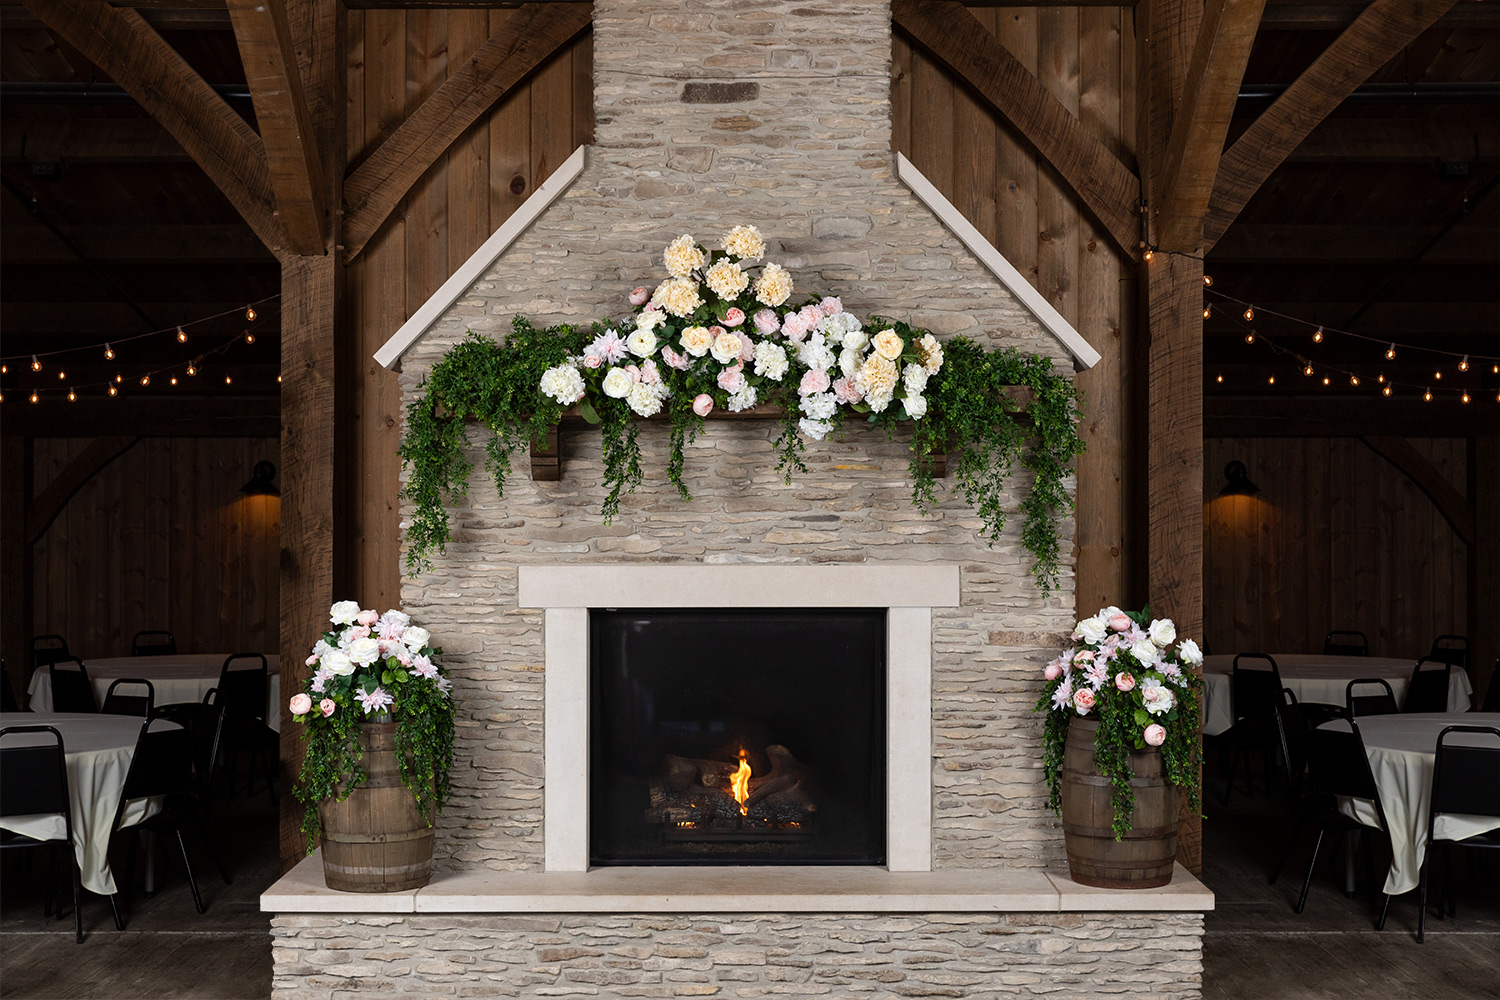
Once finished, step back and admire your beautiful floral arch! This type of statement piece makes a great backdrop or photo op and is perfect for weddings, parties, and even commercial decor. Since you can easily break it into three pieces for transport and swap out the flowers, it’s a fabulous product for event and bridal florists. “Wow” your customers with this floral basket arch and show them how it will instantly elevate their event!
Have questions about our wholesale floral supplies? Reach out to the customer service team at Pioneer Imports & Wholesale today—we’d love to hear from you!
Click here to watch a video tutorial!
A collaboration between writer Lexis Rose and Sarah Botchick of Pioneer.